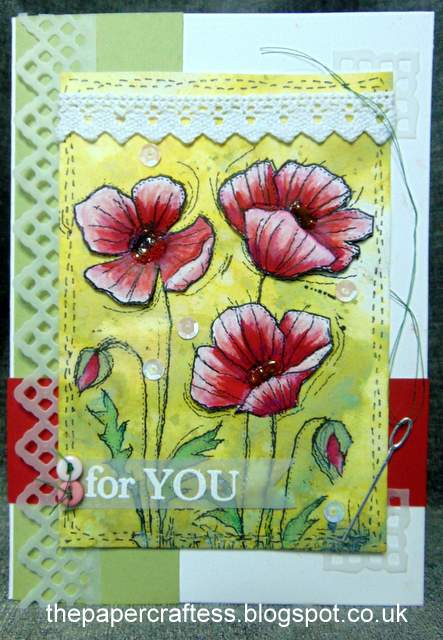
I am sharing another Distress Oxide inked card today and a few tips about putting a card together when you just cant think!!! I was struggling to make a card I really needed to send to a friend, she is such a jolly person even in the face of such difficult times. She is also a card maker so I knew she would love something a little bit different. But my head was kinda foggy with stuff!
I am entering my card into some challenges...
I knew I wanted a colourful pastel Distress Oxide inked background and to use a new Woodware flower stamp set but I struggled to think up how to put my card together. Sometimes it gets like that with me when I have a lot on my mind, or when I am struggling with pain, I just can't seem so think straight, and that causes even more stress! I suppose it's the same as writers block?


I am learning that at these times I should go back and look at previous cards that pleased me and use them as a starting point. Remember the Stitched Poppies card I made in a previous post? I was really happy with that card so I used it to help me with the card layout. rather like working with a card sketch, choosing certain elements and repeating them and maybe changing them a little! to create a similar but very different card..... I must remember to do this again as it really helped me to get going and make this rather important card (below) for a friend!
First I created the background using watercolour paper, lots of water and my Distress Oxide ink pads. after adding water to the paper liberally with a brush I swooshed my ink pads onto my glass surface and used a paint brush to add the colour to the paper trying not to think too much but also wanting to leave some white space I blobbed the ink and watched it spread on the wet watercolour paper creating areas of pastel colour. Then after drying the paper with a heat tool, I dipped my hand into clean water and sprinkled over my inked piece and dried it again watching the awesome effects Of Distress Oxides doing their thing! I love this technique, its almost fool proof and no two pieces are exactly the same
I then used the wonky stitched rectangle die to cut a piece of it out as with the Stitched Poppies card. I stamped the image using wilted violet distress ink after making sure my background was totally dry. I coloured the flower image using perfect pearls powder with a little water using a paintbrush.
Then I copied the side panel but this time I gave it a pennant tail and ran it through a leafy embossing folder. I carefully dabbed a versamark ink pad onto the raised leaves and applied dry perfect pearls powder to it with a soft paint brush, this highlighted the embossed leaves beautifully.
My card was coming together now. I had overcome that initial block and found my creative flow again!
I didn't want to distract from that lovely background so the grupier lace wasn't gonna work this time, its a bit too heavy for a delicate card. So I created a delicate white border strip using a die from the Floral Thinlit dies set by Stampin' Up instead. A pink strip of card completed the card base. After assembling the card I stamped and cut the sentiment which is taken from a Stampendous stamp set and then finally added the pearls which echo the perfect pearl elements nicely.
"Use your favourite distress inking techniques"
"Stamping (no Digi's)"
***Some of my photo's seem to make that fossilised amber (yellow) colour look a lot more intense than it actually is, I think it s because the photo was taken in bright sunshine!
This has been a good lesson for me, I made 2 very similar but very different cards, why do I always want to reinvent the wheel? I am gonna type this out and put it on my desk....
"If you just can't think what to do,
go back to when it worked for you!"


